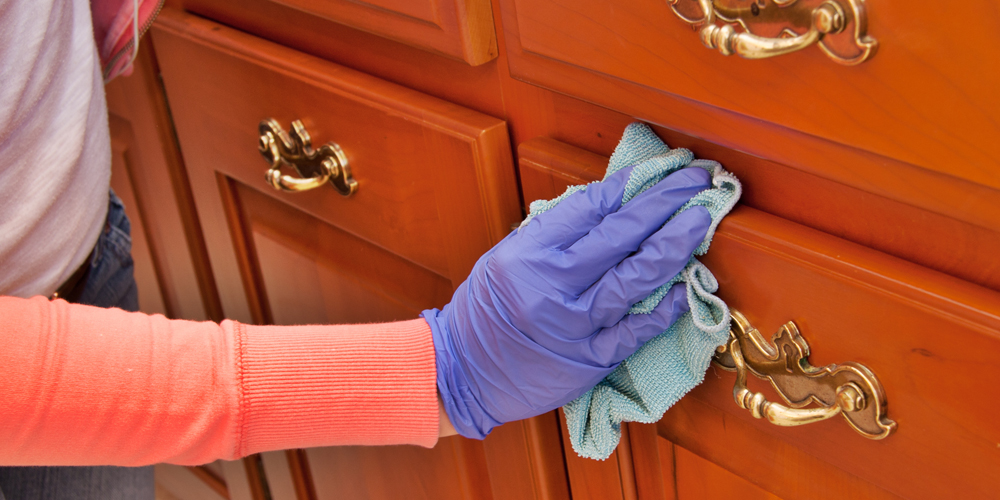
Keeping your wood furniture clean and spotless

Wood is quite different from the upholsteries in your home or office space. Quite durable in nature, wooden furniture is often designed with serious staying power and timeless relevance in terms of “aesthetic appeal” – they never go out of style; from tables to chairs, woods are always featured in our homes, farmhouses, business places, office space and often used in exotic locations e.g Royal palace. It’s everywhere.
Due to its nature, most of us find it quite easy to clean unlike the upholsteries – we simply wipe with a duster or piece of clothing when the wood furniture shows signs of dirt or grime on it! Easy, little effort, and time-saving. However, it might be complicated to clean your wood furniture effectively sometimes. Just like your upholstery, woods are made of diverse types; you could have mid-century modern with a light or dark finish or an option with a more traditional set-up, having great bones. Sometimes, when we try to dust off the grim, we are left with several shiny streaks – this can be frustrating. At other times, we find out that the grime or dirt can’t be removed.
Unlike the Upholsteries, which covers you may wipe with a sponge or wash with a device, there are a number of terms that get tossed around when it comes to wood furniture maintenance. From cleaning to dusting, polishing, waxing; all of which are done to keep the wood spotless and looking its best. Although a lot of people have their diverse opinions on how to clean and care for your wood furniture, the cleaning technique you use depends on the exact piece you own but here are some simple steps to take that are relevant to all types of wooden furniture:

#1. Dust! Dust!! Dust!!!
Dust is everywhere, hiding the beauty of everything it lays on. Not only is dust liable to build up a layer of film on your wooden furniture, it could also pose threats to your health via allergies. Most of us are guilty of spreading accumulated dust by using a dry cloth on the surface of the wood when cleaning – however, this scatters the dust in the air where it’ll float before landing back on the surfaces you just cleaned. The proper way to dust is to capture the dust in one place then you dampen a piece of clothing, using it to wipe it down!

#2. Wipe
Avoid cleaning your wooden furniture with water, especially if such wood has a plastic coating. However, you can wipe out sticky spots on the wood with soap and water – this doesn’t mean you wash like you do with cloth covers. Simply soak a piece of cloth in water mixed with mild detergent, squeeze to near dryness then wipe the affected area on your wooden furniture. After that, rinse and dry with another (dry) soft cloth.

#3. Polish
With an ABRO Furniture Polish, you give your wooden furniture a protective layer that protects your wood when exposed to a certain temperature. Avoid using olive oil because oily polish would leave your surface more slippery, making it more liable to attract more dust.
** If you find a repugnant mold of fungi on your wood, you should do this:
a. Use the soft brush attachment in your vacuum cleaner to pick up bacteria.
b. Dip a cloth in water mixed with detergent; wring such cloth to nearly dry, then wipe the area
c. Rinse and immediately dry with a soft, clean cloth

BLOG IV
CARE TIPS FOR YOUR WOODEN FURNITURE
Your wooden furniture is an integral part of home/office décor – undoubtedly your house or office will look incomplete without it. From our night stand to bedframe, dining table, bookshelves etc.; these wooden furniture often provides order and decency to your items.
Asides its ability to ensure order, it is one of your assets that can last you a lifetime; its durability is structured in such a way that it can be transferred to your kids and many more generations to come, if properly taken care of. With immense care and attention, you can keep them looking their best for years of enjoyment without need for repairs. Here are a couple of tips on how you can manage and ensure your wooden furniture lasts long and is looking its best for years to come and through multiple generations.

#Tip 1: Protect your wood
Most of us are guilty of using hot items directly on the surface of these woods; this could cause loads of damage – one that could make you make you discard it. You need to always protect your wood with coasters, trivets or holders when setting hot things on it. You could also use tablecloth or decorative placemats to protect your table from hot spills.

#Tip 2: Dust Often
One of the chores no one likes is dusting but it’s one great way to keep your wood from having buildups from airborne particles. Frequent dusting with a piece of soft clothing will enable you to reach areas of the wood that can attract and hold dust so damages can be prevented.

#Tip 3: Treat Wear and Tear
Your wooden furniture is something that you use all the time – most likely more than anything else in your home/office. As a result, they are bound to sustain injuries – face wear and tear. For this reason, it is quite important that extra caution should be given when it comes with your furniture. No doubt, there would exist scratches and incisions but in using products like the AbroGard Clear Wood Lacquer, you can treat and hide these cuts and restore the inherent beauty of your wooden furniture. However, if the damage on the surface is too wide to be treated with a polish, then you might need to resort to painting it – this will give it a new outlook and keep it durable for more years

#Tip 4: Avoid exposing it to harsh environment
Heat, sun and cold can wreak damage on your wooden furniture; therefore, avoid placing them in front of cooking fire, naked lights, uncovered windows and vents as all of these could release certain bacteria that could cause havoc on the wood.

#Tip 5: Ensure you clean your wood frequently
It is necessary that you engage in some cleaning so your wood does not get damaged completely. Dusting is cool but it isn’t enough. Be sure to follow up the tips I recommended for effective cleaning of your wood furniture (link to the previous blog post)

Final tip
Sometimes, your wooden furniture can become overly dry; in this instance, you’ll need to re-oil it by applying the ABROs on your furniture. Also, you can sprinkle the surface with some ABROs Air Freshner to keep it smelling fresh and make your furniture good as new.

5 signs of a bad alternator

It all begins with a few problems popping up for a brief moment – Flickering gauges, dimmed headlights, stalling, then strange growling noises and an odd smell. It might seem your car is haunted, but that’s false; it’s most likely a failing alternator, and if such isn’t given its due attention on time, the failed alternator may lead to the death of your car.
You might have heard or know what the alternator is all about, and you probably know it’s a key component in your Vehicle’s electrical system. But what does it do? The alternator plays a vital role in your Vehicle’s operation such that it keeps the battery of your Vehicle fully charged so you can successfully turn on your car and use electronic accessories such as your radio and headlights. How does the alternator do this? It turns the energy from the crankshaft into practical electricity through induction that powers your Vehicle’s electrical systems and keeps your battery fully charged. Hence, it provides the power needed to start the car.
Because the alternator is critically connected to other vehicle systems, it can drastically affect the car’s life. However, you can prevent this from happening by paying attention to the signs below to make it a little easier for you to diagnose car trouble caused by the alternator.
The indicator light
Your car most likely has a dashboard warning light titled “ALT” or “GEN.” that alerts you to a problem with your alternator. These lights are often the first indicator that something is wrong with your alternator. They are triggered when the output of your alternator drops below a certain level.
Be on the lookout for this warning light even if you are not experiencing any problems.
The trouble with the Headlights
Another strong signal that your alternator may not be working correctly is flickering, pulsating, or dimmed headlights. Your alternator provides energy to all accessories, including the headlights; thus, when it begins to fail, it won’t be able to power your headlights effectively, causing instability.
Other electrical failures
Just as with your headlights, a failing alternator will cause the failures of other electronics of your car; from power locks to windows, air conditioning, internal lighting, etc., these will operate at a slower speed than average or stop working altogether.
Strange noises and smell
Usually, many things can cause noise and smell in the car, so this might seem vague or harmless. But when you begin to have alternator problems, you’d notice unusual rattles that may result in growling or whining noises coming from under the hood of the car. These noises are also accompanied by the foul odor of burning rubber or wires, which is an indication that the alternator is frayed or being overworked, causing them to heat up unsafely and emit a foul odor.

Car stalls or has difficulty starting.
Your car needs some power to ignite the gasoline in your engine regardless of if it’s running on gasoline. If there isn’t enough power to keep the spark plugs and engines alive, then you’d have trouble starting the car. Usually, the sign starts with a starting trouble or a stall while running, but if this sign is ignored, then your car eventually won’t start at all. Although several other mechanical issues can cause stalling or hard starts, you should always keep a sharp eye and be aware of what the symptom means so you can pinpoint the problem. Get your alternator checked before you get stranded.
Dead Battery
Sometimes, your car battery fails on its own, but a bad alternator can lead to the death of your battery. Once your alternator fails to give power, it fails to recharge your battery, and that can cause the battery to drain. If your battery is already dead, it is recommended that you have the alternator checked before replacing the battery, so you don’t have to go through the same problem twice.

The alternator plays a critical role in the operation of any gasoline-powered vehicle because there’s a need for energy to power the Vehicle – this is in contrast with electric vehicles. Lots of energy is provided for the Vehicle’s normal operations since such cars are driven by an electric motor and battery combination.

5 Warning Signs of Worn Brakes

When it comes to car usage and maintenance, car brakes are an important part that must not be neglected. Driving around with bad brakes can be very hazardous, leading to brake failures and ultimately, accidents. Hence regular brake servicing and sometimes, replacement is advised. Thankfully, more often than not, before brakes go on to fail, they give warning signs.

So, let’s look at 5 warning signs that your brakes are worn and due for servicing or a change. 

Brake Light On: 

While this may be normal if your parking brake is engaged, your brake light shouldn’t be on when your parking brake is not engaged. If your brake light appears on your dashboard without engaging your parking brake, this is an indicator that you need to get your brakes checked. It may just be your brake system warning light, or your car’s way of letting you know that you have a problem. The Antilock braking system (ABS) warning light on your dash is a strong indicator that you need to get your car to a repair shop. 

Squealing, Squeaking or Grinding Noises: 

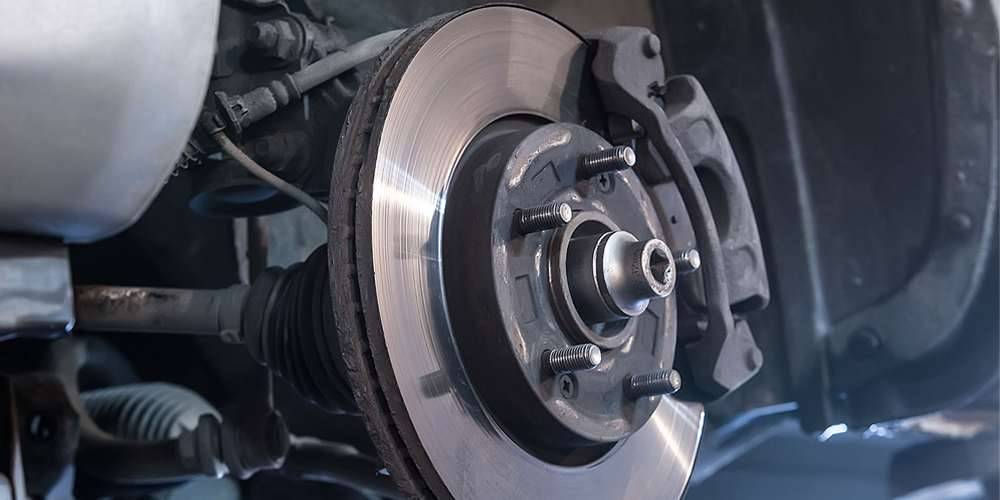
If you start to hear a metallic noise or squealing sound when you apply your brakes, this may mean that it is time to change your brake pads. Being made of steel, your brake pads making contact with your rotor is what gives off this sound. While this may not seem an imminent problem, you are better off changing the brake pads immediately as further wear could lead to damage to your rotor which is more expensive to repair. Grinding noises could be an indicator that you’ve allowed your brake pads to wear completely. This is not a good sign as it could mean that your rotor is already getting affected. You should look into it immediately. 

Vibration, Wobbling When You Brake: 

If your steering wheel starts to wobble or if you feel a vibration when you apply your brakes, then you want to listen to your brake system – it has a message for you. These vibrations could be an indicator that your rotor is uneven and needs to be checked. It could also be that your brake caliper is not releasing properly. Another cause may be that your brake components are damaged. When you feel these vibrations or wobbles when applying your brakes, it simply means it is time to visit a repair shop like the Quicklane auto repair shop by Coscharis.

Leaking Fluid: 

When your brake fluid begins to leak, it is time to replace your master cylinder. Your braking power comes from the hydraulic pressure between your master cylinder and the brake lines. So, if you’re experiencing a leakage, this could affect your braking power and ultimately cause a brake failure. 

Spongy or Soft Brake Pedal: 

If you apply your brakes and notice a lower resistance in the brake pedal, then you need to service your brakes immediately. Soft or spongy brake pedals are indicative of air or moisture in the braking system or a faulty master cylinder. Whatever the case may be, your brakes need urgent attention. 


Any of these signs implies it’s time to change your brake system or pads to avoid risk to safety while driving and while avoiding damage to other car parts dependent on the brake pads. Lucky for you, you can learn how to change your brake pads by yourself in 5minslearn how to change your brake pads by yourself in 5mins with these simple steps.

How to get rid of grease stains in the kitchen: 5 effective DIY method

Grease stains are something you can’t avoid in the kitchen because they are usually caused by oil or butter splatters, butter and other fatty foods. They are difficult to wipe off and can be tricky to clean. Grease stains affect any part of the kitchen like the walls, your cookware, kitchen utensils, oven or grill, plates, kitchen napkins.  They may also stain your sinks and taps from splash accidents while cleaning kitchen utensils. Outside vegetarian, grease stains will be commonplace as it’s associated with staple food items such as soy sauce, mayonnaise, butter, bacon, fat, ham, etc, so understanding techniques for handling them is knowledge that can be very handy.


It can be tough to get grease stains off any item in the kitchen. This is because water alone will not remove grease seeing that water molecules do not adhere to grease molecules. Human muscle and dedication alone are unfortunately not always enough to remove caked grease from a well-used kitchen. Commercial grease cleaners like our Abro oven and grill cleaner can handle most messes, but what else can you do if you cannot afford any products at the moment? Fortunately, there are ways to combat grease stains using items you already have around the house. These are the top five home remedies for removing kitchen grease below.


  • Lemon, ash, and vinegar

The acidity of the lemon and vinegar will help to break down the grease stains. If oil stains have been allowed to fester and harden,  lime and vinegar will dissolve the surface due to   their acidity. Ash, especially wood ash, contains lye which when smeared on grease dries it up and cuts it off leaving your surfaces good as new.

Application

Making a paste of ash, lemon, and vinegar is the simplest way to restore the luster of your copper vessels. Now rub this paste all over the vessels and wash them in hot water. For best results, leave the utensil in the paste for 2-3 minutes.


  • Laundry Detergent in Liquid Form

Liquid laundry detergent is another good solution for cleaning oil and grease stains because it contains various chemicals and properties created expressly to breakfor the purpose of breaking down oil and stripstripping it off materials. When you use liquid detergent on greasy surfaces it cleans the oil off effortlessly.

Application

Much like with dish soaps, sprinkle a generous amount of detergent onto the object and let it sit for a few minutes before rinsing. If the stain is on clothing, leave the detergent on the item while loading it into the washing machine for extra cleaning. If you are attempting to remove stains from upholstery, this is a great method to try before attempting to clean it with harsh chemicals that may ruin it, because laundry detergent is gentle while still very effective.


  • Salt and Rubbing Alcohol Solution

Dehydrating properties of Salt work to dry up oil and lift it off materials while rubbing alcohol breaks down oil and causes it to evaporate from materials. Alcohol dries almost instantly so you don’t have to worry about leaving a wet stain. 

Application

It is simple to know what to do if grease gets on your shirt or other clothing items, but kitchens can contain other types of fabrics that cannot be washed. For non-washable fabrics such as rugs, chair covers, and carpets, mix 1 cup of salt with four portions of rubbing alcohol (you can use measuring cups or spoons to measure it out). Rub the solution on the stain with a cloth until it lifts off with the cloth. After the grease has been removed and your solution has dried, sweep away the excess salt and wipe away any salt marks with a damp cloth.


  • Baking Soda and water

Baking soda can be used to clean up stubborn grease stains on walls, cookware, clothes, and utensils. Baking soda works wonders with cleaning grease because it is a mild alkali that causes dirt and grease to dissolve in water. Before using a cleaning sponge on any object or surface, sprinkle it with baking soda. Using a little warm water, wipe down the greasy surface.


  • Rice water

Yes, you read that correctly. Because rice water is starchy and acidic, it dissolves oily particles and is therefore extremely effective in removing stubborn oil stains. Soak the greased kitchenware for 5-10 minutes in rice water. Take them out and wash them in hot water before wiping them dry. 


These five solutions should help you get tough grease stains off any item or surface in the kitchen. However, for a quick and easy fix, you can use our Abro oven cleaner to wipe off grease stains on your oven and our grease dissolver for other surfaces.

CAR MAINTENANCE HABITS TO MAKE YOUR TIRES LAST LONGER

Hardly does anyone like plunking down money to shop for new sets of tires; this is because It takes time and costs money.  Regardless of the size of the vehicle, tires are a huge investment that can last as long as possible.  However, longevity is based on regular care and maintenance of the tire tread, tire pressure, wheel balance, alignment, and rotation.  These maintenance habits tend to extend the life of your tires and improve your car’s ride so your car can run as efficiently as possible.

Here’s a look at some quick maintenance tips that can make your tires last longer and improve your safety on the highway today;

Practice Good driving habits

Your driving habits come first in having a stable tire.  Fast starts, fast turns, and speeding and fast stops tend to cause more tire wear.  These acts also heat the rubber and cause a faster breakdown.  This also includes the apparent acts such as bumping and slamming speedily into curbs, potholes, logs, and rocks.  These incidents might not puncture the tire, but constant scraping and slamming against curb and potholes will constantly wear down the rubber until it eventually gives out — probably sooner rather than later.

Regular Check-Up

Often, most damage done to car tires goes unnoticed, and it’s not until the tire begins to fail that most car owners notice the crack, leak, or puncture.  However, you can proactively recognise these damages by inspecting the tires every few weeks for such damage.  Once the damage is noticed, you can get your tire repaired before it fails.  Look out for bulging pockets on the sidewall, Nails and screws, Gouges and scrapes on time so you can repair it on time.  This is a critical component of extending the life of all your tires.

keep up with your wheel balance, rotation, and alignment services

Have you ever noticed your steering wheel vibrates or the car seats shake when your vehicle reaches speeds of 60-70 miles per hour (mph)?  If this occurs, then there’s a problem with your tires.

Wheel alignment, tire balance, and regular tire rotations are vital maintenance requirements that will maximize your tires’ life and provide a safer driving experience.  For instance, the wheel balance has to do with how each tire sits to the vehicle.  Usually, these tires become unbalanced due to the typical wear and tear or from driving in rough road conditions.  On the other hand, wheel alignment refers to the tires’ relation to one another; thus, it is essential in keeping the vehicle driving straight and balanced.  Otherwise, the vehicle will pull to one side, with excessive wear on either side of the tire.  Quite similar to balance and alignment, keeping up with tire rotation for every 7,000 miles will ensure all four tires are wearing down evenly.  For every tire rotation, it is recommended that you also check your wheel alignment.


Stay On Top of your Tire Pressure

Another great way to extend the life of your tires is to check your tire pressure every couple of weeks.  Naturally, Tires lose a little bit of air over time, especially during the cold season, but it fluctuates midway into the fall and spring, making it necessary to do a check a little more often.  Checking it lets you maintain the correct air pressure to decrease wear and tear and reduce the risk of a blowout.

Keep Your Tires Clean

Tires are naturally tough, but you should take the time to occasionally clear the rough debris, mud, sand, and gravel from your tires to reduce the wear on the tire surface, which could affect their ability to stay firmly on the ground in an emergency. Consider a budget friendly and credible product such as the Abro Siliconized tire shine  after washing your tires to prevent dirts from accumulating on the surface once you get back on the road.

Millions of cars ply the road daily, and regardless of their size or brand, they have one thing in common -tires to ride on.  These tires come in different kinds; some are small, plain, and inexpensive for passenger vehicles, and some are big, expensive as a 24-inches with flashy rims.  What matters is how durable these tires last up for you, and it all comes down to how you intentionally maintain them because even the cheapest tires can last long if you imbibe healthy maintenance habits to them.


COOLANT – Why does my car need it?

As long as your car’s radiator is concerned, it is vulnerable to the adverse effects of each season. The cold during the harmattan season can have a seizing-up effect on it. The heat in sweltering weather can severely affect it, incapacitating the car and requiring expensive repairs. To prevent this, there’s a need to critically protect your radiator, which is an integral part of your vehicle cooling system. A form of such protection is in the application of the coolant frequently.

Not only is the coolant essential for the functioning of your radiator, but it also has a huge role to play in the effective operation of your car’s engine. It is a vital ingredient that conducts heat away from your engine so the radiator can do its job. Thus, when your radiator is low on coolant, there’s a high risk that your car engine will overheat. Sometimes, the coolant is easily overlooked, probably because it’s not a fluid that needs frequent replacement like oil. However, it shouldn’t be since it’s more like the lifeblood of your vehicle’s cooling system.

Most car owners often confuse the coolant with antifreeze; some might think they are the same. Antifreeze, is a liquid base, which main ingredient is  known as ethylene glycol, while the coolant is generally a 50-50 split between fluid (consisting of antifreeze) and water.

How does coolant work?

Usually, your car’s engine produces an incredible amount of heat when it is running – this heat, if not continuously cooled, is capable of wrecking damage to the engine.

When your car’s engine reaches operating temperature, the thermostat opens, and the water pump begins the coolant circulation throughout the system. As the coolants go through passages in the engine block and head, they pick up excess heat. With such heat, it then makes its way through a rubber hose to the radiator to get cooled off, from which such fluids exit the radiator and begin the whole process again.

Why does your car need coolant?

Running your engine without coolant would give way for engine damage caused by freezing or boiling temperature. In an instance of overheating, you wouldn’t be able to maintain an optimum fuel economy or reduce the maintenance costs & downtime since there wouldn’t be enough air freezes to protect and lubricate a significant component of your car system. Therefore, you’ll be left with an increased electrolyte, causing lots of rust and corrosion, breakdowns, and costly repairs.

However, with a coolant like the ABRO radiator coolant, you are assured that your engine is protected from severe damage. Such coolant was designed to prevent the engine from reaching boiling temperatures, among other benefits.


Just as you would with several oils and lubricants, you should also regularly inspect the coolant in your car’s cooling system to ensure that you have enough. You do this by opening up the hood of your engine (when your engine is cold) and finding the coolant reservoir, which is translucent, with a minimum fill line on the side. If your coolant is above that line, then your levels are okay.

Also, from your owner’s manual, you’ll need to determine which coolant is suitable for your car, if it can be mixed, and how it should be applied. Furthermore, most owners’ manuals recommend a coolant drain and replacement for every 150,000 miles covered, but even the best durable coolant may begin to break down before that mile is covered. Therefore, you should talk to a service advisor at any branch of the QUICKLANE NG to better understand how often you should have the coolant changed.


COSCHARIS MOTORS OFFERED LAND ROVER DISCOVERY FOR HOLE-IN-ONE AT IKOYI CLUB CAPTAIN’S DAY TOURNAMENT

The hole-in-one prize of a brand new latest version of the Land Rover Discovery SUV courtesy of the official representative of the Jaguar LandRover brand in Nigeria, Coscharis Motors clearly brought out the best out of the golfers at this year’s Captain’s day tournament of Ikoyi Club 1938 Golf Section.
The recently held event at the prestigious golf course of the elite club which had the Land Rover Discovery SUV on display at the Hole 15 for the hole-in-one competition became the star prize to take home in the tournament.
In his words at the club, Abiona Babarinde, the General Manager, Marketing & Corporate Communication, Coscharis Group, “being part of this year’s Captain’s day tournament of Ikoyi Club Golf Section is to add more fun and value to the entire golf event by being part of the sponsors. We all know that the dream of every golfers, either a Professional or an amateur is to win the almighty ‘hole-in-one’ competition of any golf tournament and that was exactly what we did in conjunction with our premium brand, Jaguar Land Rover presenting our latest version of the Land Rover Discovery. Cleary this uplifted the morale of all participants which delivered the excitement the Jaguar Land Rover brand stands for especially as it resonates with its right priority audience like the members of the prestige Ikoyi Club Golf section. We are surely delighted that our contribution added value and excitement to the entire tournament”.
In addition, Peter Eben-Spiff, the Chairman, Organizing Committee, Ikoyi Club 1938, Golf Section who couldn’t hold his excitement in appreciating the sponsorship of Coscharis Motors with the Jaguar Land Rover brand, stated that “Without any doubt, the Jaguar Land Rover brand added great value to this year’s Captain’s day tournament. The premium Land Rover Discovery on the golf course as the hole-in-one prize really pushed for more participants of over 200 members that played to win the luxurious SUV right on display. The executive team on behalf of all members of the Golf Section of the club really appreciated this sponsorship and look forward to more collaborations with the Jaguar LandRover brand courtesy of their representative in Nigeria, Coscharis Motors who equally has a pedigree in Nigeria when it comes to iconic automobile brands”.
The Discovery as the most versatile seven seat SUV offers unique experience in terms of luxury, practicality, powered convenience, capacity and safety. The Discovery offers a wide variety of features to make your life easier especially given the flexibility of its in-car technology.

About Us.
Coscharis Motors Plc has the exclusive franchise to distribute and service all Jaguar Land Rover vehicles in Nigeria. Its sales and service dealerships dot the Nigerian landscape and provide customers the required proximity.


Back to media page

How to change brake pads in 5 minutes

In the second quarter of 2020, brake pad failure accounted for a total of  112 accidents i.e 5% of the total road accidents on Nigerian highways according to a study that was carried out by the Nigerian Bureau of Statistics, which makes it important to know what brake pads are and how to fix them on our cars to prevent adding to the huge existing numbers. 


What are brake pads? Brake pads are parts of the disc brakes used in automotive and other mechanical systems. Brake pads are composed of steel backing plates with friction material bound to the surface that faces the disc brake rotors.Brake pads are responsible for the friction of your tires against the road, slows down, and stops your car. Your brakes are what’s responsible for stopping the wheels from spinning, the brake pads are responsible for the resistance needed to cause this action. 


In order to prevent accidents or bad braking systems, you need to do two things 

  • Check your brake fluid regularly
  • Change your brake pads regularly 


If your brake pads are completely damaged, here are the 5 steps to change them yourself at no cost;


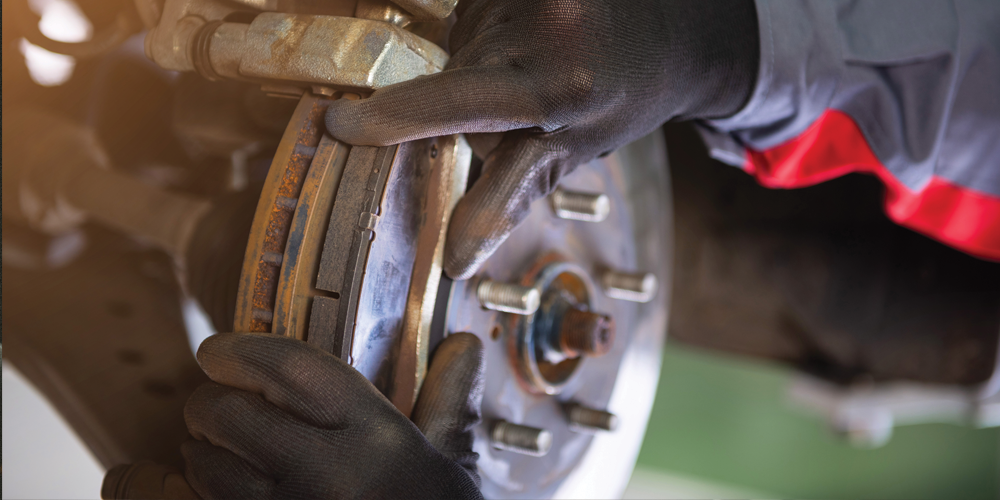
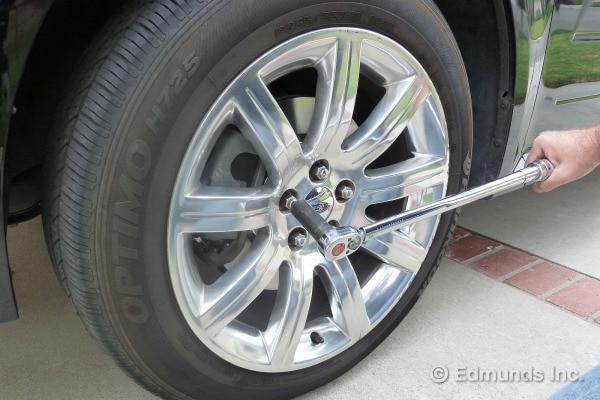
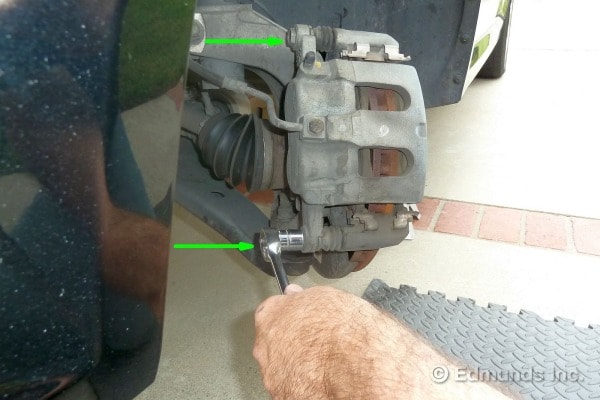
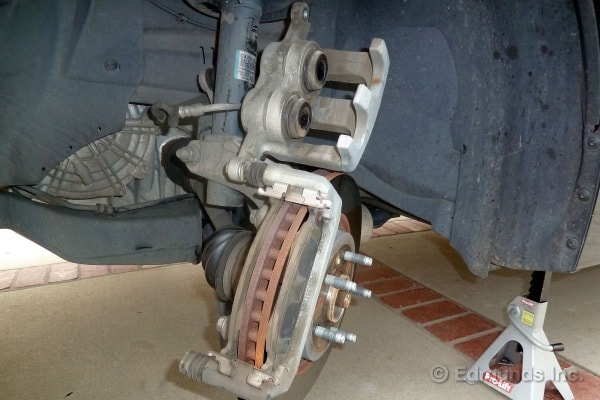
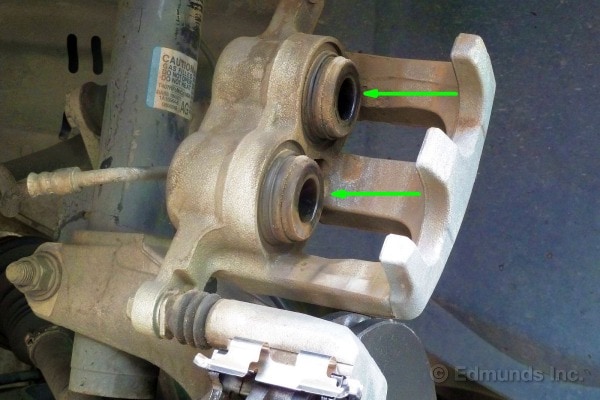
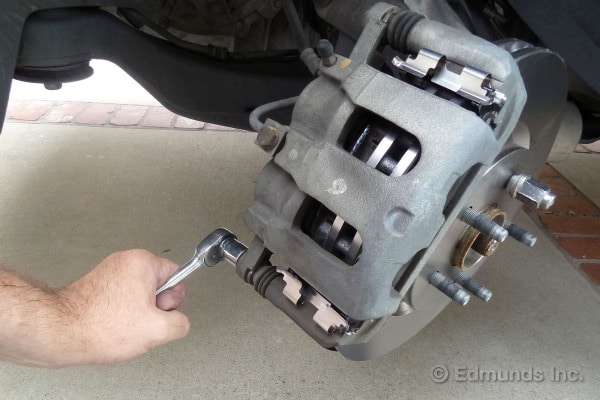
  1. Remove the wheels & slider bolt – Loosen the lug nuts on the wheel. Then jack up the car and place a jack stand under the car’s frame. Lower the jack so its weight rests on the jack stand. Fully remove the lug nuts and remove the wheel. You now have access to the brake assembly and can safely reach under the car. Find the two slider bolts (sometimes called “pins”) that hold the caliper in place. 


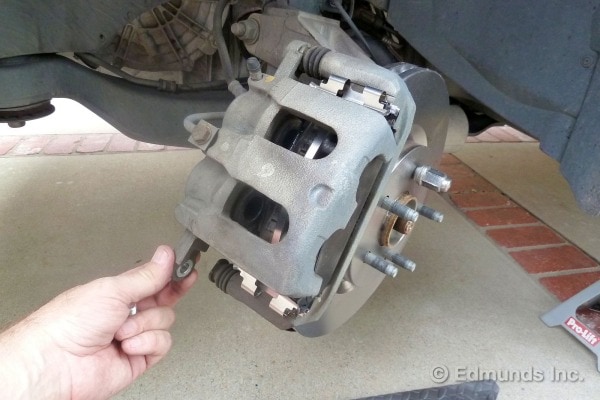
  1. Pivot the caliper up – with the caliper up, it is very easy to inspect the thickness of the brake pads to confirm that they need to be changed. 


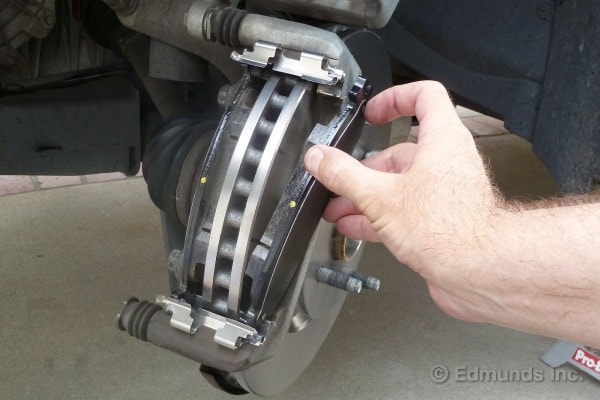
  1. Remove old brake pads and Slide in the new brake pads – Simply slide the old brake pads out, Always replace the old brake. Slide-in place the new pads slide into place as easily as the old ones did when they came out, though sometimes the new clips will be tighter. The ears of the new pads should slot nicely into place on the grease you applied.


  1. Retract the pistons and Monitor the brake fluid level – 


Before you can lower the caliper into place, these pistons need to be retracted (pushed back) so that they will clear the new, thicker brake pads. 


  1. Reposition the caliper and Reinstall the slider bolt – With the pistons retracted, the caliper should slip over the pads with little effort. Sometimes the fit is tight and the caliper will slide on the newly installed brake pads. 


Reinstall and retighten the slider bolt. Straighten the car’s wheels, re-mount the tire and tighten the lug nuts. 


Having replaced your brake pads, test-drive the car under safe conditions to make sure everything is working properly, being especially careful of the first few stops. Be aware that your brake pedal might have a higher engagement point. You will quickly get used to this change. Enjoy using your new brakes knowing there are now thick brake pads to stop you safely.


How to clean kitchen utensils and keep them sparkling

As fun and exciting as cooking can be, the aftermath is usually a messy kitchen full of dirty utensils. In this part of the world, we have people over a lot and host parties as often as we can for every occasion. It’s always fun to have people over and have a nice time. However, after all the fun and festivities you’re often left alone to wash up the piled-up dishes and clean your dirty utensils. When faced with such situations you contemplate throwing some utensils away because you’re not sure how to get some of the burnt and other stubborn stains off them. 


In this article, we’ll be exploring all the methods you can employ to clean your kitchen utensils and keep them sparkling. Washing utensils doesn’t have to be a daunting process, it can be easy and seamless once you know the right thing to do. We’re going to give you a breakdown of how to wash kitchen utensils with baking soda, how to clean wooden kitchen utensils and, how to sterilize them for maximum safety.

Cleaning Kitchen Utensils by Hand

Step 1: Wipe off Leftover Food

Leftover food on utensils will contaminate the cleaning water, making the cleaning process less productive. Clean off any big chunks of food stuck to the utensil with a napkin or tissue. Don’t bother yourself with small stubborn stains that refuse to wipe off. They will come off when you wash the utensils.


Step 2: Fill your Kitchen Sink with Hot Water

Plug your sink and pour hot water in. Add approximately 1 tablespoon of liquid soap into the water as the sink fills up. Read the label of the dishwashing liquid bottle to determine the proper amount of liquid to use, as some cleaning products don’t require you to use that much.

Step 3: Add Baking Soda to the Mix

Baking soda is a perfect addition to the mix because it’s an excellent natural cleaner. It aids in breaking down stains and removing bad odors. For extra cleaning power, mix two tablespoons of baking soda with the water and dishwashing liquid.

Step 4: Soak the Dirty Kitchen Utensils

Soak the dishes to soften the stubborn stains and make them easier to wash off. You can put in the utensils that are very stained last so the water doesn’t get too dirty.

Step 5: Scrub Each Utensil

Place the utensils inside the sink and clean them with a dish brush or sponge. Scrub each utensil until all the food is removed.


Here are different types of Dish Washing Brushes and Sponges (link to the post)

Step 6: Rinse each Kitchen Utensil

After washing the utensils, thoroughly rinse them with running water from the tap. Make certain that all cleaning agents are completely removed.

Step 7: Dry the Utensils

Allow the utensils to air dry or dry with a lint-free dish towel. Return each utensil to its proper place after drying. Alternatively, leave the utensils to dry naturally on the drying rack. This option is simple and prevents stainless steel utensils from becoming splotchy. If you air-dry your utensils, make sure they are not stacked on top of each other because this will prevent the air from transferring and drying them.

Cleaning Wooden Utensils

Wooden utensils can be harder to clean than their stainless steel counterparts, they also retain odors, both good and bad so they require more care. Here is a step-by-step process for cleaning your wood utensils.

Step 1: Scrub with Hot Soapy Water

Use a scrubbing brush to remove food particles from your wooden utensils, then wash with a dish sponge or brush and soapy water. Don’t worry if there are stains left after the initial wash.

Step 2: Apply Salt, Lemon, and Baking Soda to stains

Lemon has acidic components that help eliminate all odors when paired with salt it scrubs off most tough stains. Cut a lemon in half then add salt to the surface of one of the lemons. Use the lemon and salt to scrub the wooden utensils, if there are still some stains left you can use baking soda and lemon juice to get them off.

Step 3: Rinse 

Once you’re done with the cleaning process, rinse off all residue with water. Make sure you rinse off all the cleaning agents.

Step 4: Dry Utensils In the Sun

Naturally sundry your wooden utensils to lighten stains, keep them fresh, and eliminate all odors. It should take about one hour for them to completely dry. If it’s not a sunny day you can air-dry inside the kitchen.


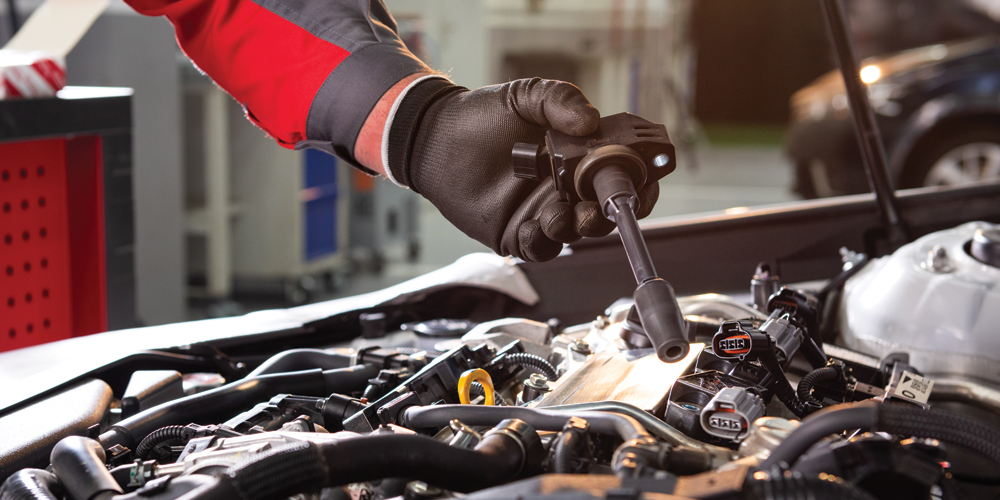
How to maintain your spark plugs for more than 6 months

Spark plugs function just like small lightning bolts, this is because they generate the electricity required to ignite the fuel or air mixture in an engine’s combustion chamber. Spark plugs play an essential role in creating power for the engine to start and run. One spark plug is required for each cylinder of the engine. As a result, each spark plug requires a wire to connect it to the coil’s distributor. Spark plugs appear to be simple devices, and in theory, they are. They do, however, necessitate precise timing in order to function properly. The bulb-like tip on one end connects to the wire head, which generates the high voltage required to send the energy that ignites the engine. A ceramic insulator is required for protection because the charge can range from 40,000 to 100,000 volts. The alternator generates electricity, which travels through the coil, distributor, and the core of the spark plug to the opposite end with the hook-like appearance.


Your car will not start or go anywhere if it does not have a healthy spark plug. And, because spark plug health is directly related to engine performance, it stands to reason that weak or bad spark plugs cause problems, whether it is problems with cold starting or misfires during acceleration. Furthermore, without a good spark plug, your ride will not be able to sustain maximum power, and your vehicle’s fuel economy will suffer. 


Some people usually have a lot of issues with their spark plugs and have to change them monthly or bi-monthly. However, there are lots of tricks you can adopt to make your spark plug last at least six months. Spark plugs can last for several years, depending on how far you drive and how well you maintain your engine. Typically, the electrode is the part of the spark plug that gets faulty and makes you have to change it. Because your engine is so intricately connected with your engine the best way to keep it healthy is to treat your engine right. Here are some tips to keep your spark plugs working for a long time:


  • Avoid Spark Plug Deposit Build up.
  • Avoid constant overheating 
  • Avoid oil leaking into your combustion chamber.
  • Avoid carbon build up.
  • Always do a thorough cleaning before taking out your old spark plug and replacing it.
  • Inspect new spark plugs to make sure they are not damaged before fixing them in your car.
  • Make sure you check on your spark plugs regularly to identify any damage or wear so you can fix it.
  • Always make sure your spark plugs are properly gapped.